
Choose the categories vendors may use, the attribute groups they fill in and the extra fields of the vendor application. Vendors cannot create categories, attributes or manufacturers; they choose from yours.
Categories open for vendors
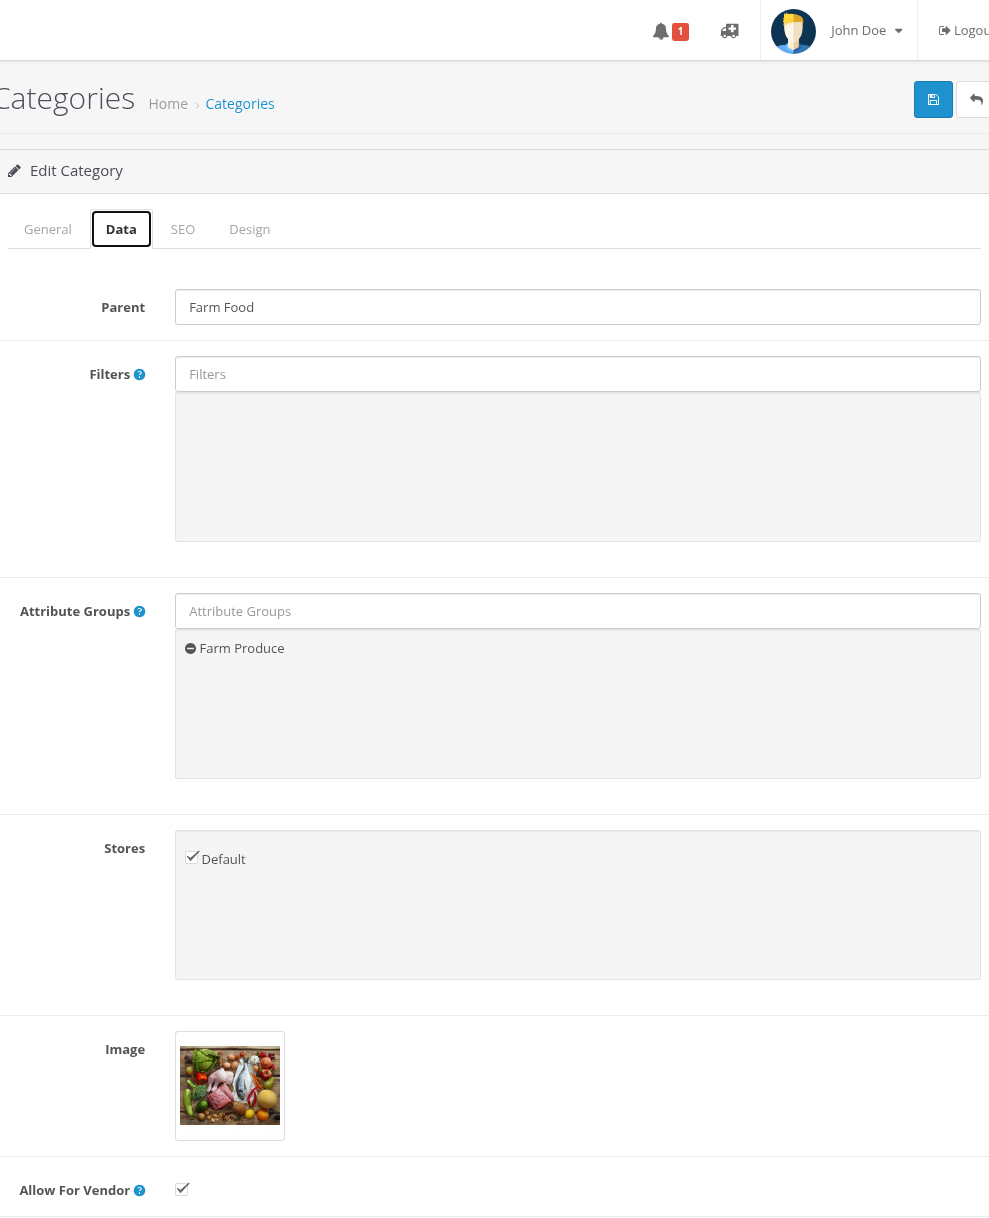
Vendors can put products only into categories with the Allow For Vendor flag.
- Open Catalog > Categories and edit a category.
- Check Allow For Vendor ("Allow vendors to place products to that category").
- Save.
The flag works for each category separately. It is not inherited: if you open a parent category, its subcategories stay closed until you check the flag in each of them. A subcategory is open for vendors only when its parent categories are open too.
The store checks the category when a vendor saves a product, in the form and in the Product API. If you close a category later, the products already in it keep it, and their vendors can still edit them; they only cannot move other products into it.
A vendor product has one category. The vendor chooses it in the Category list of the product form.
Attribute groups per category
In the same category form, the Attribute Groups field lists attribute groups for this category: "These attributes will be available to vendors when they start to create a product in that category". Start typing a group name and select it; remove a group with the minus icon.
When a vendor selects the category in the product form, the attributes of these groups appear under Product Attributes, one text field per attribute and language. Empty values are not saved.
Attributes and groups are created as usual in Catalog > Attributes and Catalog > Attribute Groups.
Vendor fields
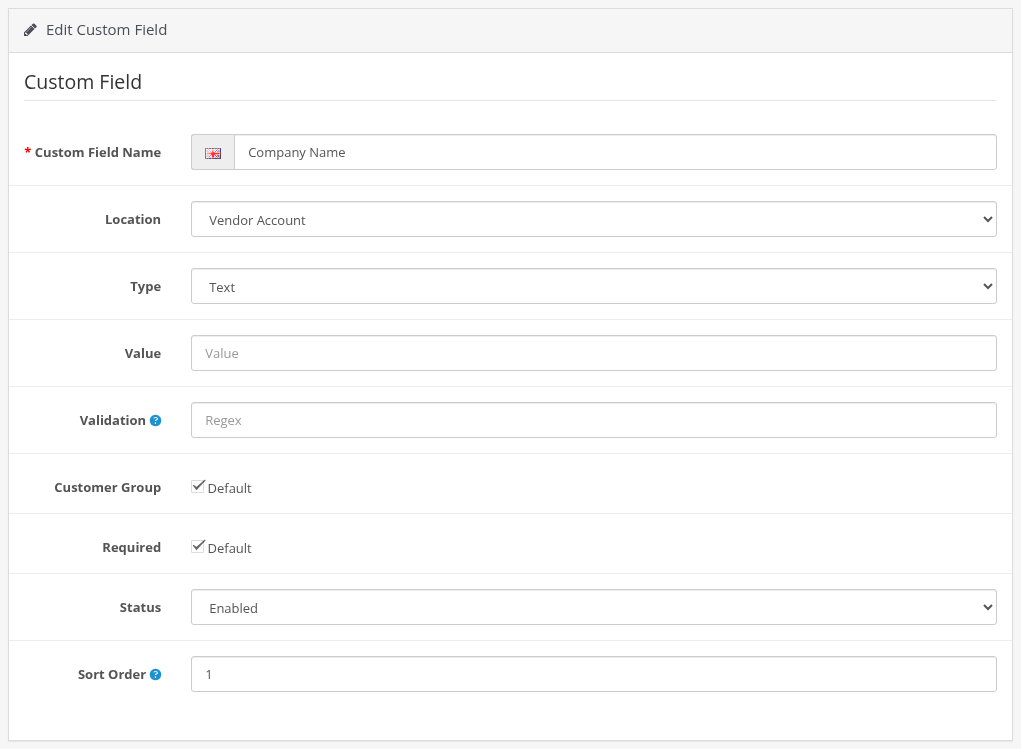
To ask vendors for extra data (company name, tax number, bank account and so on), use OpenCart custom fields with the location Vendor Account.
- Open Customers > Custom Fields and add a field.
- Set Location to Vendor Account.
- Check the Customer Group of your vendors (usually the default group). The field is shown only to customers of the checked groups.
- Set Required, the validation pattern (for text fields) and the sort order as needed.
These fields appear in the "Your Vendor Details" part of the vendor registration form and in the vendor profile, and in the Vendor tab of the customer in the admin. Required fields and validation patterns are checked.
The Vendor field and product list filters
- The admin product form has a Vendor field: "The field shows an owner of that product". For an existing product it shows the vendor name with a View Profile link; double-click the name to change the owner. Choose the empty value to make it a store product.
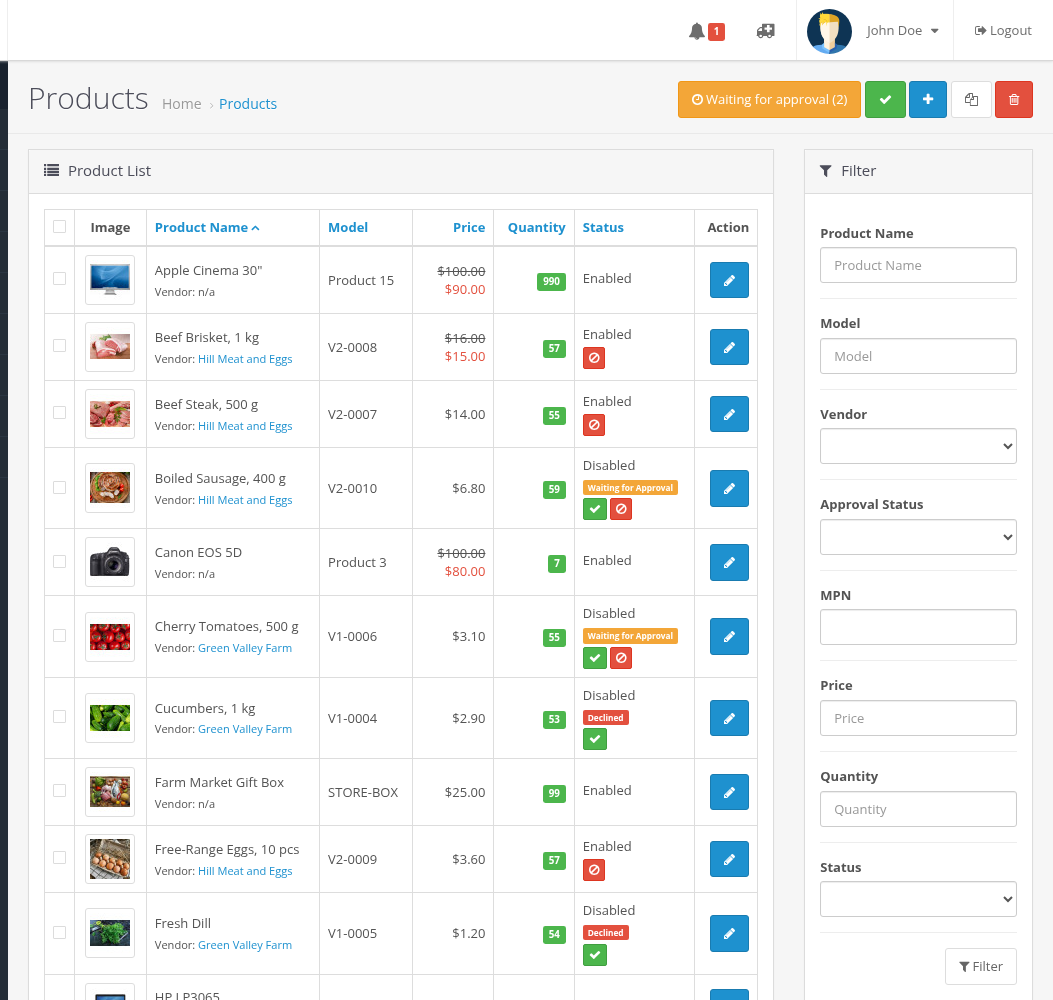
- The product list shows "Vendor: name" under the product name, or "n/a" for store products.
- The product list filter has Vendor (with No Vendor for store products), Approval Status (Approved, Waiting for Approval, Not Approved) and MPN.
Store products without a vendor
You do not have to be a vendor to sell your own products. Products with no vendor work as usual:
- they stay in the main order, without a vendor order and without commission;
- in the cart they form their own group, quoted with your store shipping methods;
- they do not go through product approval.